 By Alan Wheat, Senior Product Manager.
Creating a Closing Book – essentially taking large volumes of documents and converting them to a single PDF – can be a time-consuming and expensive exercise. Often it means hours assembling hundreds of case files from multiple locations and in many different formats.
Automating the process of converting many documents into a single PDF means creating Closing Books is less labor-intensive and staff are free to work on other projects. Our solution, pdfDocs Binder, has been doing this at law firms for over a decade. It takes only three steps to produce a high-value Closing Book: create the binder, add the documents, and convert.
1. Making a binder
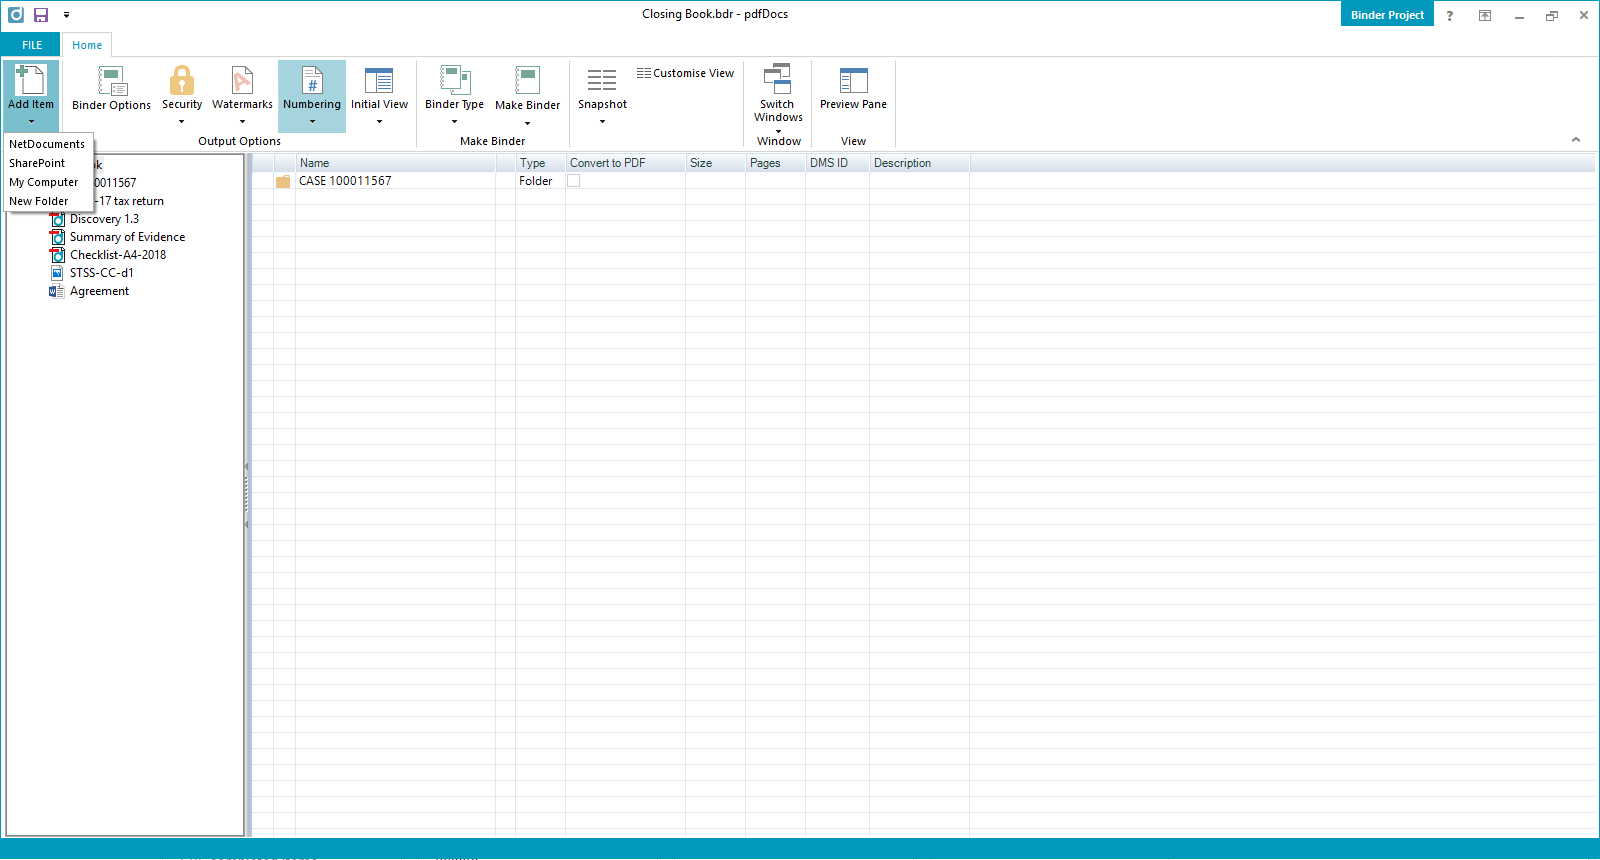
When you create a new Binder Project, it’s then possible to add documents from several different locations: Windows Explorer folders, your network, or a document management system (DMS) like iManage, NetDocuments, or Worldox. Rearrange the documents and folders by dragging and dropping them within the interface.

All the documents in the binder can be converted to PDF or remain in their original format. You can choose a document to become the cover page and edit it in its original form within the binder – a feature that is especially useful if you need to write an executive summary or abstract about the contents of the binder.
2. Preparing the contents
When you’re ready to hit create on your Closing Book, the application will automatically generate a Table of Contents, hyperlinks, and bookmarks. It’s all designed to save you time but ensures readers can easily navigate through the collection of documents.
Apply page numbering, date and time stamps, or information from the DMS (such as author, Doc ID, or version) in the document headers and footers. Create and save header and footer settings to apply to future Binder Projects.
To keep styles consistent, or just minimize the amount of work going into each Closing Book, you can create templates from scratch or even from an existing Binder Project. Templates can include security, numbering, and watermark settings, as well as formatting and corporate stationery.

3. Generating the Closing Book
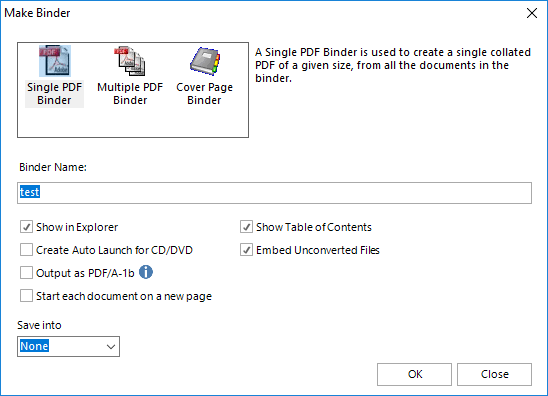
Once all the documents and folders have been added to the binder and the Closing Book is ready to be finalized, it is simply a matter of pressing Make Binder. There are three binder output options available: Single Document, Multiple Documents, or Cover Page – the latter containing only cover page and Table of Contents items for review ahead of producing the final binder.

The finished Closing Book can be saved to your file system, network, or DMS (single PDF and cover page only). As part of the creation process, pdfDocs Binder will generate an Autorun.inf file. This is required to launch your cover page automatically if you decide to burn and distribute the binder on a CD or a DVD.
Need to add or remove a document after you’ve created the binder? You don’t have to start from scratch. Simply make the changes in the Binder Project and regenerate to update the Table of Contents and cross-document bookmarks and links.
Related


